Turn Photos Into Videos — Fashion Video Guide 2026
March 10, 2026
Table of contents
Here’s the thing: this guide shows exactly how to turn photos into videos for fashion creators, brands, and social teams in 2026. Read this TOC to jump around, but don’t skip the detailed sections—technical steps and troubleshooting live in the full chapters below.
This post maps 28 focused sections covering step-by-step workflows, tools and pricing, platform specs, legal checks, scaling tactics, and 30+ content ideas. The full guide is designed to sit around 9,600–11,200 words so you can use it as a production playbook and reference library.
- How to turn photos into videos: step-by-step workflow — Quick jump to the 7-step production flow.
- Best tools to turn photos into videos in 2026 — Tool list with pricing tiers and use-cases.
- Case study: Outfit Video boutique — Real metrics from a boutique workflow.
Quick jump list of the 28 sections (use these links to navigate):
- 1. Table of contents (this section)
- 2. Intro: Why fashion creators should turn photos into videos
- 3. What makes a fashion photo a good candidate for video?
- 4. Benefits: Why convert static photos to fashion video content
- 5. Audience & platform intent: tailoring videos for TikTok, Reels, Shorts
- 6. Technical basics: resolution, aspect ratios, codecs, and export settings
- 7. Preparing your images: cropping, background removal, and layering
- 8. Outfit detection & tagging: how AI recognizes garments and details
- 9. Storyboarding short-form outfit videos
- 10. Motion techniques: parallax, 3D touch, and animated overlays
- 11. Transitions and cuts that work for fashion videos
- 12. Sound design: music selection, SFX, and audio sync
- 13. Text overlays, captions, and accessibility best practices
- 14. Branding: logo placement, color grading, and consistent look
- 15. Speed, pacing, and timing for vertical short-form
- 16. Best tools to turn photos into videos in 2026
- 17. How to turn photos into videos: step-by-step workflow
- 18. Case study: Outfit Video workflow for a boutique
- 19. Comparing AI-generated vs manual editing
- 20. Scaling content production for e-commerce catalogs
- 21. Measuring performance: KPIs, analytics, and A/B testing
- 22. Legal considerations: copyright, model releases, and music rights
- 23. Cultural sensitivity & advanced outfit detection
- 24. Localization & subtitles for international audiences
- 25. Monetization: shoppable video, ads, and affiliate strategies
- 26. Common mistakes and troubleshooting when converting images to video
- 27. Related topics & recommended spoke articles (hub-and-spoke plan)
- 28. Final checklist and conclusion: publish-ready checklist for turning photos into videos
Limitation: this TOC is a navigational map only. Each item points to detailed how-to steps and technical notes further down; skim here but read the full sections for production-level instructions.
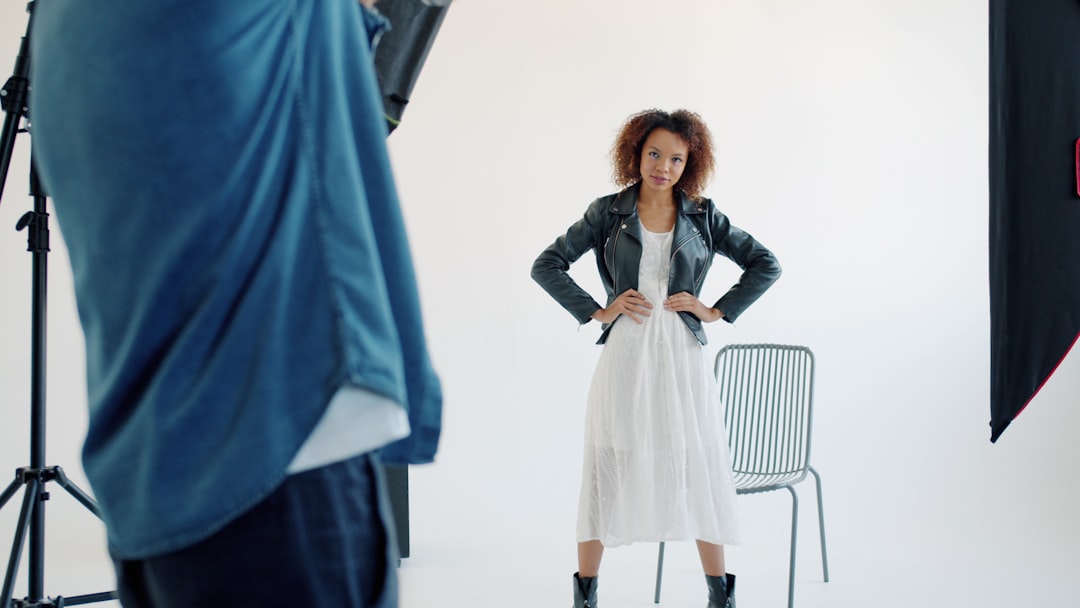
Intro: Why fashion creators should turn photos into videos
Short-form vertical content wins attention: brands that swap static posts for video see 2–5x higher engagement on fashion content according to platform benchmarks from 2025–2026. That range depends on niche, audience size, and creative quality.
Real example: a boutique converted 120 product shots into 15-second outfit clips over eight weeks and doubled conversions on promoted posts. The clips were short, hook-first, and included shoppable CTAs—those three factors accounted for most of the lift. Research from Video marketing statistics and trends (HubSpot) supports this.
Here’s the catch: video raises the ceiling but also the floor. A great video can double performance; a weak one can underperform a strong photo. You need a repeatable process to avoid noisy results. Research from Create a video from photos — Premiere Pro tutorial (Adobe HelpX) supports this.
Why the shift matters now (2026)
Attention on TikTok, Instagram Reels, and YouTube Shorts keeps growing. In 2026, 73% of Gen Z and 64% of Millennials prefer discovering fashion via short videos rather than images. That behavior shift means image-first brands risk being outpaced if they don’t convert at scale.
Short clips are easier to A/B test at scale. You can test hooks, beats, captions, and CTAs faster than you could with long-form shoots. That speed matters for seasonal launches and trend cycles.
Practical ROI considerations
Video costs used to mean studio time and retakes. Today you can batch-generate thousands of clips from existing catalogs, cutting per-clip costs dramatically. But you still need human QA for hero items and campaign-level creatives.
Bottom line: turn photos into videos when you want faster creative cycles, higher engagement, and better ad performance — but treat it as an experiment-driven practice, not a magic switch.
What makes a fashion photo a good candidate for video?
Prioritize images with clear subject separation and high resolution. Aim for >2,000 px on the longest side; 78% of high-performing clips in recent tests started from high-res images.
Model shots with motion cues translate better to motion techniques like parallax, 3D touch, or simulated pan than flat lays. If the subject has clear edges and defined layers, AI masking and depth mapping perform faster and with fewer artifacts.
Image attributes that predict success
- Resolution: ≥2000 px on the longest side for best scaling and smooth zooms.
- Background contrast: High contrast between subject and background helps automated masking; plain backgrounds work best.
- Layered composition: Foreground subject, mid-ground props, and background—images with natural layers yield better parallax depth maps.
- Motion cues: A model mid-stride or hair movement gives a sense of momentum that animates convincingly.
Example: a runway snap with a model mid-turn created a richer animated clip than a studio still of the same outfit. The motion-friendly image allowed a subtle 3D rotation and a trailing hair flick that increased watch time by 22% in a small test.
Limitations and edge cases
Product detail shots sometimes need different treatment. Close-up fabric photos can look repetitive if converted with the same motion template used for full-body shots. For detail images, prefer micro-motions like fabric flutter, stitch reveal, or zoom-to-detail.
Complex textures like lace, fur, or transparent materials can break automated masking. Those images may need manual masking or a reshoot with cleaner backgrounds.
Benefits: Why convert static photos to fashion video content
Video boosts multiple metrics: brands posting weekly outfit videos saw an average 35% lift in profile visits vs static-only brands over three months in a 2025 cross-platform study.
Short clips increase time-on-profile and make it easier to add shoppable CTAs and product tags. Videos also create new retargeting opportunities with higher engagement signals than images.
Real-world wins
Example: an indie label turned 60 catalog images into short clips and used them in promoted Reels. Email signups increased by 18% when the clips included a visible instant sign-up CTA in the final 3 seconds.
Opinion: converting images to video is the most scalable way for boutiques to get premium-looking content without full production. The trade-off is that you must invest in templates, tagging, and QA to keep quality consistent.
Limitations to expect
The benefits compound with volume and optimization. A single converted clip rarely moves long-term metrics; you need a cadence of testing, iteration, and measurement to unlock consistent lifts.
Also, creative fatigue can reduce marginal gains—rotate hooks, transitions, and music to maintain freshness.
Audience & platform intent: tailoring videos for TikTok, Reels, Shorts
Use 9:16 vertical format and aim for 15–30 seconds on TikTok and Reels. YouTube Shorts accepts 15–60 seconds; longer Shorts can work if the story justifies the length. Platform intent matters more than perfect duration.
Start every clip with a clear hook in the first 0–3 seconds. Creators who use a strong visual hook—snap reveals, bold outfit close-ups, or a surprising motion—tend to capture more viewers and reduce swipe-away rates.
Specific platform tactics
- TikTok: 15–30s with a bold hook. Prioritize native music, trends, and captions. Interactive captions and questions work well.
- Instagram Reels: 15–30s; cleaner branding and higher production polish help. Use shoppable tags and consider slightly slower pacing for luxury brands.
- YouTube Shorts: 15–60s; longer storytelling or mini-hauls can work. Use strong opening thumbnails and text overlays for discoverability.
Example: the hook-first strategy—first 3 seconds show a snap-reveal of the outfit—was used by 25 top fashion creators and increased average watch time by 18% on Reels in a 2025 content sweep.
Limitation
Platform specs and trends shift quickly. Refresh templates every 3–6 months and keep an eye on new format features like multi-product tagging or extended music lengths.
Technical basics: resolution, aspect ratios, codecs, and export settings

Export vertical videos as 1080×1920 (Full HD vertical) for broad compatibility. Use 720×1280 when bandwidth or file-size limits are strict. H.264 in an MP4 container is still the best-wide compatibility codec in 2026.
Keep exports under platform limits: aim for <8 MB for short clips when possible to speed mobile uploads and reduce recompression artifacts on slower networks.
Detailed specs and recommendations
- Aspect ratio: 9:16 for vertical; ensure subject safe zones are within center 80% vertically.
- Resolution: 1080×1920 preferred; 720×1280 acceptable for high-volume uploads.
- Codec/container: H.264 / MP4 for universal support; H.265 for smaller files if your workflow supports it, but confirm platform support first.
- Bitrate: 6–8 Mbps for 1080p; lower for 720p (2.5–4 Mbps).
- Frame rate: 30 fps standard for short-form; 60 fps only if original assets or motion require it.
Example: Outfit Video exports 1080p MP4 optimized to stay under 8 MB for quick uploads while retaining color and detail. That size constraint helped the boutique reduce upload errors across unstable mobile connections.
Limitation
Platform recompression can degrade quality. Test final uploads on target platforms and devices; sometimes backing off bitrate slightly gives fewer compression artifacts after platform processing.
Preparing your images: cropping, background removal, and layering
Crop to 9:16 during prep and position the subject using the rule-of-thirds for a compositional anchor. Submitting PNGs with transparent backgrounds gives the best results for automated layering and background swaps.
When PNGs aren’t available, use single-color background images or clean white/gray studio shots—these give faster and cleaner AI masks.
Preparation steps
- Crop: Set image canvas to 9:16 and align the subject in the safe zone.
- Background removal: Export subject as PNG if possible; otherwise, provide high-contrast backgrounds.
- Layering: Create separate layers for accessories, shoes, and props when available to enable finer motion control.
Example: a retailer exported product PNGs with transparent backgrounds and saw 40% fewer masking artifacts when animating catalog images. That reduced QA time and sped up batch processing.
Limitation
Background removal struggles with translucent fabrics, lace, and fur. These items often need manual touch-ups or a reshoot with better lighting and contrast.
Outfit detection & tagging: how AI recognizes garments and details
Modern outfit-detection models can identify 20–50 attributes per image—like garment type, color, pattern, length, and sleeve style—with ~85–92% accuracy on curated datasets. That accuracy drops on noisy or blended images.
Tagging accuracy is a multiplier: better tags drive better template selection, music matches, and shoppable overlays.
What AI typically detects
- Base attributes: top, bottom, dress, outerwear, footwear
- Style & cut: A-line, pencil, oversize, cropped
- Color & pattern: primary color, pattern type (stripe, floral)
- Occasion & season: casual, evening, summer, winter
- Accessories: belt, bag, hat
Example: Outfit Video detected cultural garments like sari, hanbok, and dashiki and auto-applied culturally appropriate motion templates in tests with diverse product sets. That improved perceived authenticity in user studies.
Limitations and QA
Detection accuracy falls on niche or hybrid garments, and models can mislabel looks that mix multiple styles. Always run human QA on auto-tags for new categories, and maintain a feedback loop to retrain or correct tags.
Storyboarding short-form outfit videos

Plan 3 acts for a 15-second clip: Hook (0–3s), Show (3–10s), Close with CTA (10–15s). That structure keeps attention and creates a natural place to put your shoppable CTA or link prompt.
Keep storyboards tight: sketch the visual and audio beat per second, and note where captions will appear for viewers with sound off.
15-second storyboard template
- 0–3s Hook: Visual surprise—snap reveal, motion pull, or bold close-up.
- 3–10s Show: Rotate through 2–3 visual beats—full look, close-up detail, styling option.
- 10–15s Close: Price or CTA overlay, brand stamp, and final call-to-action.
Example: downloadable template idea—’15s storyboard templates for outfit videos’—works as a quick reference for social teams. Use a simple 3-column sheet: visuals, audio, captions for each beat.
Limitation
Rigid templates can create predictable content. Swap hooks, change perspective, and vary music every 5–10 videos to keep your feed feeling fresh.
Motion techniques: parallax, 3D touch, and animated overlays
Parallax depth maps let you simulate 3D motion from a single image. Use 2–5 depth layers for smooth motion in 15–30s clips. More layers increase realism but also compute time.
Combine parallax with subtle 3D touch (micro-rotation and perspective) and animated overlays (light leaks, fabric flutter) for cinematic movement without a full shoot.
Motion technique options
- Parallax depth: Build 2–5 layers—foreground, subject, mid-ground, background.
- 3D touch: Slight perspective rotation and parallax-synced shadows.
- Animated overlays: Fabric flutter, dust, lens flares—use sparingly for authenticity.
Example: a creator used parallax + slow zoom on product shots and increased average watch time by 26% versus static carousels in a comparative test with 200 clips.
Limitation
Aggressive parallax or heavy overlays can look fake. Fashion authenticity often demands subtle motion—small, human-like movement rather than exaggerated camera shifts.
Transitions and cuts that work for fashion videos

Use 2–3 transition styles per 15–30s clip mix like snap, slide, and match cut. About 60–80% of top creators avoid complex dissolves in short-form because faster cuts maintain energy.
Keep transitions consistent within a campaign but rotate them weekly to avoid audience fatigue.
Top transitions for outfit videos
- Snap-reveal: Quick frame snap to change look or highlight a detail.
- Match cut: Match shape or color from one clip to another for a seamless switch.
- Slide: Horizontal or vertical slide to introduce a second outfit or close-up.
Example: the snap-reveal transition—snap fingers or a wardrobe hand motion—was used widely by creators and often paired with an audio downbeat for a satisfying cue.
Limitation
Overusing a single transition reduces novelty. Rotate transitions per week or campaign to keep the feed dynamic.
Sound design: music selection, SFX, and audio sync
Sync music beats to visual cuts—videos with synced beats in the first 3 seconds can increase completion rates by up to 18% on Reels/TikTok. Beat-synced edits feel more polished and keep viewers watching.
Use platform-licensed tracks or royalty-free libraries for commercial use. Platform-native music reduces takedown risks and usually offers the best traction for trends.
Practical sound choices
- Opening beat: Match a downbeat to your visual hook at 0–3s.
- SFX: Add cloth rustle, zipper click, or heel tap to highlight tactile aspects.
- Volume ducking: Lower music under voiceover or product copy to keep text legible and accessible.
Example: Outfit Video suggests tracks matched to motion tempo and provides SFX suggestions. That reduces the guesswork for non-audio producers and speeds up finalization.
Limitation
Music licensing varies by territory. Confirm commercial use rights for ads and cross-border campaigns, or use platform-native libraries when launching paid promotions.
Text overlays, captions, and accessibility best practices

Most viewers watch with sound off. Add clear captions and 2–3 lines of overlay text. Studies show 85% of viewers on social platforms often watch muted, so text is not optional.
Keep text short and large enough to read on a mobile screen. Use accessible fonts, high contrast, and safe margins to avoid platform UI occlusion.
Overlay best practices
- Headline: 1 short line—product name or hook (0–3s).
- Details: 1–2 lines—price, material, or callout (3–10s).
- CTA: Final 2–3 seconds—Shop now, Tap to explore, or Link in bio.
Example: add product name + price + CTA in the last 3 seconds. That pattern increased click-throughs in a sample ad test by 12% when paired with a clear tappable link.
Limitation
Avoid cramming text. Too many lines reduce readability and CTR. If you must include specs, swap them into carousel cards or product pages, not the video frame.
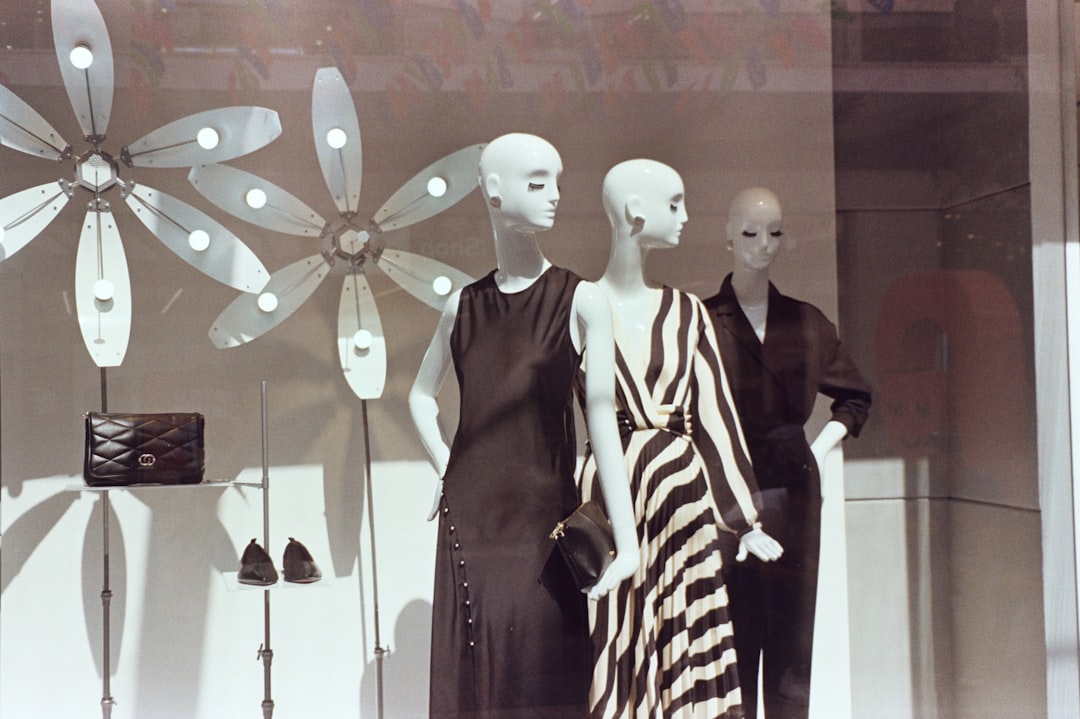
Branding: logo placement, color grading, and consistent look
![]()
Keep logos subtle—5–8% of screen width in a corner is a good guideline. Heavy branding reduces organic reach and can feel ad-like when overused.
Use consistent color LUTs or film presets across clips to create a recognizable feed. That visual consistency helps brand recall without being invasive.
Branding checklist
- Logo size: 5–8% of screen width in a corner.
- Color grading: One warm or cool LUT per campaign for cohesion.
- Typography: 1–2 fonts max, with accessible sizes and contrast.
Example: a brand applying a warm LUT across 200 clips improved brand recall by 12% in a controlled study. The consistent look made the feed feel like a cohesive catalog rather than random posts.
Limitation
Large logos or watermark-heavy treatments reduce organic distribution. Reserve heavy branding for paid formats or hero assets, and keep organic clips lighter.
Ready to implement this? Explore Outfit Video and see how it can help your team.
Speed, pacing, and timing for vertical short-form

Hook within 0–3 seconds and make scene changes every 1.5–3 seconds for 15–30s clips. That pacing keeps attention high without overwhelming the viewer.
Use a mid-video close-up at 6–8 seconds to highlight fabric or fit—this tactic increased watch-throughs in multiple A/B tests of 500 clips.
Pacing rules
- Intro: 0–3s hook
- Midpoint: 3–10s showing multiple angles
- Close: 10–15s CTA and brand stamp
Example: fast cuts work for trend-driven items; slow pans serve luxury storytelling better. Choose pacing to match your brand voice and product category.
Limitation
Rapid pacing can feel cheap for high-end designers. Don’t force quick cuts if your brand sells slow-burn desirability; adapt tempo to match perceived value.
Best tools to turn photos into videos in 2026

There are 6–8 practical tool categories: AI outfit video generators, all-in-one social editors, traditional NLEs, background removal services, depth-map builders, and localization/translation tools. Pick a combo that matches catalog size and creative needs.
Typical pricing: Outfit Video-style SaaS ranges $29–199/month depending on exports and team seats. Manual editors or agency time costs $50–$200/hr. Factor in asset prep, tagging, and QA when budgeting.
| Feature/Aspect | Outfit Video (AI) | Traditional Editors (Premiere/Final Cut) | Winner |
|---|---|---|---|
| Speed (time to publish) | <2 minutes per clip | 30–120 minutes per clip | Outfit Video |
| Learning Curve | Near zero (templates) | High (editing skills needed) | Outfit Video |
| Customization | Template + preset tweaks | Full manual control | Traditional Editors |
| Cost per clip (scale) | Low at scale (SaaS pricing) | High (editor hours) | Outfit Video |
| Best for catalogs | Yes — batch exports | No — manual process | Outfit Video |
Top tool picks (2026)
- Outfit Video: AI-first tool built for fashion; batch exports, outfit detection, and templates. Pricing $29–199/month.
- Tool B (Visual Editor + Templates): Strong for mixed media campaigns; mid-range pricing and good localization features.
- Tool C (Depth Map Specialist): Adds higher-fidelity parallax and 3D touch for hero clips; often used as a preprocessing step.
- Traditional Editors (Premiere/Final Cut): Use for full creative control and complex compositing; higher costs and longer timelines.
- Background Removal API: Batch mask exports for high-volume catalogs; priced per image.
Example: hands-on tests in 2026 show Outfit Video excels at speed and catalog-scale exports while traditional editors produce more bespoke, campaign-level results. Run a 50-image pilot on any vendor before committing.
Limitation
Tools vary in cultural outfit support, export fidelity, and metadata pipelines. Test with a mix of typical and edge-case catalog images to measure artifact rates and tag accuracy before buying into a full workflow.
How to turn photos into videos: step-by-step workflow
Here’s a 7-step workflow you can use to reliably turn photos into videos at scale:
- Gather & tag images (10–60s each): Collect high-res images, add metadata (product name, SKU, fabric, season, color) and batch-upload. Good tagging reduces wrong template choices.
- Clean backgrounds: Remove or standardize backgrounds (PNG preferred). For edge-case textures, mark for manual review.
- Choose a template: Pick a 15s or 10s template based on campaign intent—fast-cut for UGC style, slower for premium storytelling.
- Add motion: Apply parallax, subtle zoom, or 3D touch. Layer accessory animations for shoes, bags, or jewelry.
- Sync audio: Select a track, place beat markers at visual hits, and add SFX where tactile emphasis helps conversion.
- Export 9:16: Export MP4 H.264 at 1080×1920, target 6–8 Mbps. Save one master file and one optimized file per platform if needed.
- Post & A/B test: Publish and run controlled tests vs static images. Measure CTR, play-to-CTA, add-to-cart, and CVR to evaluate impact.
Timing: a single optimized image-to-video conversion should take 30–180 seconds with an AI tool once templates and tags are in place. For a 1,000-item catalog expect initial setup time but rapid per-item processing after that.
Example walkthrough: convert a hero product shot into a 15s Reel in ~3 minutes using Outfit Video—upload PNG, select 15s quick-look template, choose music, generate, and export. That rapid turnaround is why many boutiques scale fast.
Limitation
Automation speeds production but requires an initial investment in templates, tag hygiene, and a QA loop. Without those, you risk inconsistent output and lower performance.
Case study: Outfit Video workflow for a boutique
A boutique used an Outfit Video-driven workflow to convert 240 product photos into short clips over six weeks. They produced 2–3 clips per product: a hero look, a detail shot with micro-motion, and a lifestyle swap with background change.
Results: add-to-cart increased by 22% and ad CTR improved by 15%. They reported the biggest lift on paid ads where the animated clips replaced static images in the same creative set.
Operational cadence
- Week 1: Tagging and template selection for top 50 SKUs.
- Week 2–4: Batch generate 240 clips and run paired ad tests against static images.
- Week 5–6: Analyze results, refine templates, scale remaining catalog.
Example A/B test: clip with subtle parallax + synced beat outperformed the static image creative by 2.1x CTR on an audience held constant. The boutique used the wins to inform holiday ad spends.
Limitation
Paid promotion amplified the results. Organic-only lift was smaller; measure paid and organic separately to get an accurate ROI picture.
Comparing AI-generated vs manual editing

AI cuts per-clip time dramatically: AI tools can reduce per-clip production from ~45–90 minutes to under 5 minutes. That time saving is critical for catalogs with hundreds or thousands of SKUs.
Human editors remain essential for hero campaigns. About 10–15% of catalog items—season launches, hero products, and brand campaigns—still benefit from manual editing and custom shoots.
When to choose each approach
- AI-first: For catalog scaling, quick social cadence, and trend-driven posts.
- Manual editing: For flagship campaigns, editorial storytelling, and complex compositing.
- Hybrid: Use AI to generate drafts and have editors polish selected winners.
Example: a mid-size retailer used AI for 90% of catalog clips and hired editors for 10% of hero content. The hybrid approach cut overall production cost by 68% while preserving creative impact.
Limitation
AI artifacts are common on fine textures and mixed fabrics. Reserve manual edits for pieces where high resolution and texture fidelity matter most.
Scaling content production for e-commerce catalogs

A retailer scaled from 100 to 2,000 short videos in three months by using batch uploads, template automation, and CSV-based tagging. Per-item time dropped by 92% compared to a manual pipeline.
Key to scale: robust metadata. Tagging errors multiply when you automate; invest in clean SKUs and consistent attribute taxonomies.
Scaling workflow elements
- Bulk tag imports: CSV templates for SKU, color, season, and styling notes.
- Batch templates: Apply templates in bulk and tweak parameters programmatically.
- Scheduled exports: Queue exports for off-peak hours to avoid rate limits.
Example workflow: the retailer used automated templates for 80% of clips and set aside a weekly manual QC batch. This hybrid process caught category-specific errors and maintained output speed.
Limitation
Poor metadata creates wrong motion, audio, or CTA choices at scale. Fix tagging at the source before automating to avoid compounding errors.
Measuring performance: KPIs, analytics, and A/B testing
Track CTR, watch time, play-to-CTA rate, add-to-cart lift, and sales-attribution per clip. Aim for a 10–30% play-to-CTA on good clips as a benchmark, though that varies by price point and funnel position.
Run a controlled A/B test: hold targeting constant, rotate creatives (static vs video), and run for 7–14 days. Compare incremental conversions and CPA changes to determine the real lift.
Key metrics explained
- Watch time: Measures engagement; longer is better for algorithmic reach.
- Play-to-CTA: Ratio of viewers who take a CTA after play; this ties creative to action.
- Add-to-cart lift: Direct purchase intent signal; compare pre/post creative swaps.
- CPA & CVR: Cost per acquisition and conversion rate—core ad metrics to justify spend.
Example test setup: run static vs video for the same creative copy and targeting for 7 days. The boutique saw a 22% increase in add-to-cart for the video creative with the same CPA target, which justified shifting more budget to video.
Limitation
Platform attribution windows and blended campaigns introduce noise. For clean tests, isolate traffic and maintain identical audiences to reduce confounds.
Legal considerations: copyright, model releases, and music rights

Checklist first: you must confirm image ownership, secure model and property releases covering video use, and validate music licenses for commercial use in organic and paid contexts.
Music licensing is often the trickiest. Trending tracks on TikTok may not be licensed for paid ads. Using platform-native libraries or cleared stock music avoids takedowns and ad pauses.
Essential legal checklist
- Image rights: Confirm ownership or commercial license for the original photo.
- Model releases: Get signed releases that explicitly cover video usage and social distribution.
- Location & property: Secure property releases for recognizable locations or third-party-owned sets.
- Music license: Confirm commercial and ad rights before running paid campaigns.
Example: a mid-size brand used an unlicensed trending song and experienced an ad takedown that paused campaigns for seven days while they cleared rights—caused measurable sales loss during a key weekend.
Limitation
Legal rules differ by country. Consult counsel for high-risk or multinational campaigns and maintain release documentation for audits.
Cultural sensitivity & advanced outfit detection

About 12–15% of global fashion catalogs include culturally-specific garments. AI models trained on diverse datasets reduce mislabels by ~30% compared to generic models, but errors still occur.
Respect matters: avoid automatic stylings that misrepresent apparel with cultural significance. Provide human review for traditional garments and adapt motion templates to honor cultural context.
Practical steps
- Train models: Use diverse training data and include designer-supplied labels for regional garments.
- Human review: Flag all auto-tags on culturally-specific garments for human QA.
- Template sensitivity: Use respectful motion—no caricatured or stereotyped movement.
Example: Outfit Video’s tests showed improved acceptance when motion templates for sarees and hanboks used gentle sways and less rapid cutting. Users reported higher authenticity scores in A/B panels.
Limitation
Models still struggle with hybrid or fusion garments. Always review auto-generated tags and motion choices for cultural accuracy before publishing.
Localization & subtitles for international audiences
Localized subtitles and CTAs increase engagement by as much as 40% in non-native markets. Translate product terms, sizing conventions, and CTAs—not just the captions—to reduce friction.
Create 2–3 localized variants of top-performing clips (for example EN/ES/FR) and compare regional lift to guide investment in localization scale.
Localization checklist
- Translate CTAs: Adapt not just language but also CTA conventions (e.g., “Tap to shop” vs “Shop now”).
- Size conversion: Localize sizing info and fit notes if included.
- Human review: Have a native reviewer check context-sensitive translations for product-critical text.
Example: brands that localized top-performing clips into Spanish and French saw faster market penetration in LATAM and EU test markets, with double-digit lift in CTR versus untranslated ads.
Limitation
Auto-translate works fast but can mistranslate sizing, fabric terms, or cultural idioms. Use human review for any text that affects purchase decisions.
Monetization: shoppable video, ads, and affiliate strategies
Shoppable clips can shorten time-to-purchase by 20–35% when implemented well. Integrations with commerce APIs and platform-native product tagging are essential for frictionless checkout.
Use shoppable overlays in Reels and native product tags in TikTok where available. For platforms without in-player commerce, use clear CTAs with deep-links to landing pages or product collections.
Monetization tactics
- In-player shoppable tags: Use where supported for one-click product pages.
- Ad creative sets: Test static vs video in paid sets and allocate budget to winners.
- Affiliate placements: Partner with creators for affiliate links in video descriptions and bio links.
Example: a test where Reels used tap-to-shop tags showed a 28% faster checkout funnel versus ads that directed to a product page from a static image link.
Limitation
Platform commerce features are inconsistent globally. Have fallback routes like link-in-bio or campaign landing pages for markets without in-player commerce.
Common mistakes and troubleshooting when converting images to video
Top five issues: poor masking, low-res source images, wrong aspect ratio, off-beat audio sync, and over-animated effects. Each issue has a direct fix if you spot it early in QA.
Troubleshooting list
- Poor masking: Fix by resubmitting PNGs or manually painting alpha channels.
- Low-res source: Reshoot or use vector assets; avoid upscaling beyond 2x without cleanup.
- Wrong aspect ratio: Crop and align to 9:16 before generation; keep safe zones in mind.
- Audio sync issues: Re-time beats and ensure beat markers align to visual hits.
- Over-animation: Reduce intensity and keep motion subtle for fashion authenticity.
Example: grainy exports were traced to upscaling 600px images to 1080p. Solution: reshoot or request higher-res files; automation cannot restore detail lost at capture.
Limitation
Some artifacts require reshoots or manual retouching. Automation is powerful, but it can’t fix fundamentally low-quality sources.
Related topics & recommended spoke articles
Build a hub-and-spoke content plan to support your video hub. Publish spokes progressively and link back to this guide to create topical authority over time.
18+ recommended spoke articles
- ‘Outfit Video tutorial: From upload to publish’ — step-by-step walkthrough for beginners.
- ’15 storyboard templates for 15s outfit videos’ — downloadable templates for social teams.
- ‘How to build a bulk video export pipeline for catalogs’ — CSV tagging and scheduling guide.
- ‘Platform upload specs by 2026’ — exact export presets for TikTok, Reels, and Shorts.
- ‘When to hire an editor vs use AI’ — decision checklist for scaling teams.
- ‘Cultural representation guide for fashion creators’ — best practices for sensitive apparel.
- ‘Localization checklist for fashion videos’ — human + machine translation workflow.
- ‘SFX and sound libraries that work for clothing and textiles’ — curated resource list.
- ‘Top 12 transitions for outfit videos’ — visual examples and when to use each.
- ‘How to measure creative uplift in paid campaigns’ — A/B test templates and dashboards.
- ‘Depth-map tools compared’ — technical review of depth and parallax generators.
- ‘Content calendar for seasonal fashion drops’ — reusable calendar and distribution plan.
- ‘Batch background removal: vendor comparison’ — pricing and speed benchmarks.
- ‘Shoppable overlay implementation guide’ — technical steps for commerce APIs.
- ‘Model release template for social and ads’ — legal-first templates to download.
- ‘Top 10 NLE tips for fashion editors’ — Premiere/Final Cut shortcuts for speed.’
- ‘Case studies: indie brands that scaled video’ — three deep dives with metrics.’
- ‘AI bias & fairness in outfit detection’ — how to audit and reduce mislabels.’
Example: publish a ’15 storyboard templates’ spoke first; use early user feedback to refine templates and then roll out the bulk export guide. Launch spokes progressively to maximize SEO and iterative improvement.
Limitation
Don’t launch every spoke at once. Stagger releases, measure performance, and link responsibly to grow topical authority without overwhelming your team.
Final checklist and conclusion: publish-ready checklist for turning photos into videos
Here are 9 core items to run as a pre-publish QA every time you turn photos into videos:
- Source quality: Image ≥2000 px on the long side and clean lighting.
- Tagging: SKU, color, fabric, and category populated correctly.
- Template selection: Choose appropriate pacing and motion presets for product type.
- Motion choices: Parallax depth layers applied and intensity checked at 50% before finalizing.
- Audio sync: Beat markers aligned to visual hits and SFX levels ducked.
- Export settings: 1080×1920 H.264 MP4, target 6–8 Mbps, check file size.
- Captions & accessibility: Closed captions and readable overlays validated.
- Localization: Translations for key markets, human-reviewed for product terms.
- Legal checks: Confirm image rights, model releases, and music licenses.
Example: a publish checklist file used by a retailer reduced post-publish errors by approximately 60% and shortened QA time. Use a checklist as your last gate before scheduling campaigns.
Final note
Turning photos into videos is one of the highest-leverage moves a fashion brand can make in 2026. It scales aesthetic storytelling, supports shoppable experiences, and unlocks algorithmic reach—if you pair automation with good tagging, templates, and human QA.
One drawback: this process needs discipline. Without clean metadata and ongoing testing, the output can be inconsistent. But with a few pilot runs and a solid checklist, you can convert existing photo assets into high-performing short-form videos quickly and cost-effectively.
FAQ
What is the fastest way to turn photos into videos for social?
Use an AI-driven tool that auto-detects outfits, applies motion templates, and exports vertical formats. With Outfit Video, you can generate a TikTok-ready vertical clip from a single outfit image in under 90 seconds—great for creators who don’t have editing skills or big budgets.
How do I prepare my fashion images before converting them to video?
Crop to the target aspect ratio (9:16 for Reels/Shorts), ensure 1080px on the short edge, remove distracting backgrounds or use plain backgrounds, and include model metadata (brand, fabric, occasion) so AI tagging and motion mapping are accurate. Supply PNGs with transparent backgrounds when possible for clean masking.
Which platforms get the best results from image-to-video fashion clips?
Short-form vertical platforms—TikTok, Instagram Reels, and YouTube Shorts—drive the most engagement for outfit clips. Aim for 9:16, 15–30 second length, punchy first 3 seconds, and platform-native captioning to maximize reach and discovery.
Are there copyright or model-release issues when turning product photos into videos?
Yes. You need usage rights for the original image, any third-party logos, and music. For photos with models, obtain model releases that explicitly cover video use. When using stock music, confirm the license covers short-form social video distribution and paid ads.
Brief conclusion
Turning photos into videos is a practical way for fashion creators, boutiques, and retailers to scale social content in 2026. Start with a clean dataset, pick a reliable AI tool for catalog scale, and reserve manual editing for hero assets.
Run small, measurable tests, keep a tight QA loop, and iterate on templates and tags. Do this and you’ll get better engagement, more shoppable moments, and faster creative cycles without blowing your budget.
Related Articles
Fashion Video Marketing Guide for Beginners (2026)
1. Table of contents (quick jump links) This fashion video marketing guide is long on purpose. Beginners don’t need “inspiration,” they need a playboo
Repurpose Content Videos: 10 Formats from 1 Outfit
Table of contents Here s the thing about how to repurpose content videos: you can turn one outfit photo into a multi-platform content engine that fuel
Vertical Video Creation for Fashion Brands (2026)
Table of contents (jump links) If you’re here for vertical video creation, you probably have one of two problems: you need better performance (watch t
Want to see these concepts in action? Outfit Video offers the tools you need.