How to Film Outfit Videos at Home Without a Studio
May 19, 2026
How to Film Outfit Videos at Home Without a Studio
Studios are expensive. A half-day rental in a major city runs anywhere from $300 to $800, not counting equipment, a crew, or the time it takes to coordinate everything. For most boutique owners, independent designers, and e-commerce sellers, that cost structure simply doesn’t work — especially when the algorithm rewards consistency over production perfection.
Here’s the thing: the best-performing outfit videos on TikTok and Instagram in 2026 aren’t coming out of rented lofts with softboxes and $5,000 cameras. They’re coming from bedrooms with good natural light, from living rooms with a clean wall, and from creators who understand that intention beats equipment every single time.
This guide is a complete, practical walkthrough for filming outfit videos at home — covering lighting, backgrounds, camera setup, movement, audio, and the post-production decisions that separate forgettable clips from content that actually converts.
Key Takeaways
- Natural window light is the single most powerful (and free) tool available for DIY outfit video lighting — direction and time of day matter more than gear.
- Your phone camera is capable of professional-quality footage; settings and stabilization matter far more than the device itself.
- A clean, intentional background communicates brand authority — you don’t need a cyclorama wall to look polished.
- Shooting in vertical (9:16) from the start saves significant time in editing and prevents cropping issues across platforms.
- AI tools like Outfit Video can transform static outfit photos into social-ready video content, removing the need to film at all in many use cases.
- Batch filming — capturing multiple outfits in a single session — is the most efficient way to build a content library on a tight schedule.
- Audio quality has a measurable impact on viewer retention even in outfit-forward content; always prioritize a clean sound environment.
Understanding Your Space Before You Set Up a Single Light
Before you buy a ring light or rearrange furniture, walk through your home at different times of day and look at how light moves through each room. This single exercise will tell you more about your filming potential than any equipment guide.
North-facing windows produce the most consistent, diffused light throughout the day — ideal for fashion because it doesn’t create harsh shadows on fabric texture or skin tone. South-facing windows are brighter but shift significantly from morning to afternoon. East-facing rooms give you excellent soft morning light that drops off by noon. West-facing rooms are often too warm and contrasty for fabric detail until the last hour before sunset.
Look for walls that are neutral or lightly textured: white, off-white, warm beige, or light gray. These backgrounds reflect light back onto the subject (you or your model) and keep the visual focus on the clothing. Avoid busy wallpaper, heavily decorated shelves, or walls with strong color casts — green and orange walls in particular will bleed color onto light-colored garments and skin.
Identify at least two potential filming spots in your home: one for daytime natural light content, and one that works with artificial light for evenings or overcast days. Having both locations ready means you can batch film without being held hostage to weather or time of day.
DIY Outfit Video Lighting: What Actually Works
Lighting is the most discussed and most misunderstood element of home video production. The fashion industry has conditioned people to think they need elaborate setups — but the math doesn’t support it. A $25 sheer white curtain used to diffuse direct sunlight through a large window produces softer, more flattering light than many $200 ring lights.
Here’s a practical breakdown of the most common DIY lighting setups for outfit videos:
| Setup | Estimated Cost | Best For | Main Limitation |
|---|---|---|---|
| Natural window light (diffused) | $0–$30 for sheer curtain | Daytime filming, authentic aesthetic, detail shots | Weather and time-dependent |
| Ring light (10–12 inch) | $40–$80 | Close-up detail, face-forward content, evening filming | Circular catchlight looks artificial; poor for full-body shots |
| LED panel light (bi-color) | $80–$150 | Full-body outfit shots, controlled color temperature | Requires basic knowledge of Kelvin settings |
| Two-point softbox setup | $120–$250 | Consistent studio-style results, flat-lay and styling shots | Takes up space, setup time required |
| Bounce card (white foam board) | $3–$8 | Filling shadows from a single light source, handheld use | Requires a second person or stand to position |
The most critical principle in outfit video lighting is this: one strong directional light source plus one fill is almost always enough. Place your key light (window or LED panel) at roughly 45 degrees to the side of your subject. Use a white foam board or a second, dimmer light source on the opposite side to fill the shadow. That’s the entire formula.
Color temperature matters enormously for fashion. Daylight is approximately 5600K. Most interior bulbs run between 2700K and 3200K. Mixing these temperatures — for example, having a warm lamp visible in the background while shooting with a daylight-balanced panel — creates an ugly, inconsistent color cast that makes garments look different on screen than they do in person. Match your sources or eliminate the ones you can’t control.
Camera Setup and Stabilization for Home Filming
Your phone is almost certainly sufficient. The rear cameras on flagship phones since 2023 shoot 4K at 60fps with dynamic range and computational processing that genuinely competes with dedicated cameras at similar price points. What separates professional-looking footage isn’t sensor size — it’s stability and framing discipline.
A sturdy tripod is non-negotiable. Not because handheld looks unprofessional in all cases (it can work for intentional UGC-style content — and if you’re weighing those formats, the breakdown in Fashion UGC vs Brand Video: What Converts Better is worth reading before you decide on your approach), but because inconsistent handheld movement during outfit showcase content looks unintentional rather than stylistic.
Key camera settings to adjust before filming:
- Lock exposure and focus: On iPhone, press and hold on the subject until the AE/AF lock appears. On Android, most native camera apps have equivalent manual lock options. This prevents the camera from adjusting mid-clip.
- Shoot in the highest resolution available: You can always downscale. You cannot recover detail you didn’t capture.
- Frame vertically (9:16) from the start: If you’re creating content for TikTok, Instagram Reels, or Pinterest Video Pins, shooting vertically eliminates reframing issues. Check out the Vertical Video Specs for Every Social Platform in 2026 guide for exact crop-safe zones per platform.
- Turn off digital zoom: Optical zoom or none. Digital zoom degrades footage quality significantly.
- Set frame rate to 24fps or 30fps for standard clips, 60fps if you plan to create slow-motion sequences.
For self-filming without a second person, a Bluetooth remote shutter trigger (typically under $15) lets you start and stop recording without running back to the camera. A flexible tripod arm or adjustable floor tripod gives you the range of heights needed to capture both full-body shots and close-up detail footage in the same session.
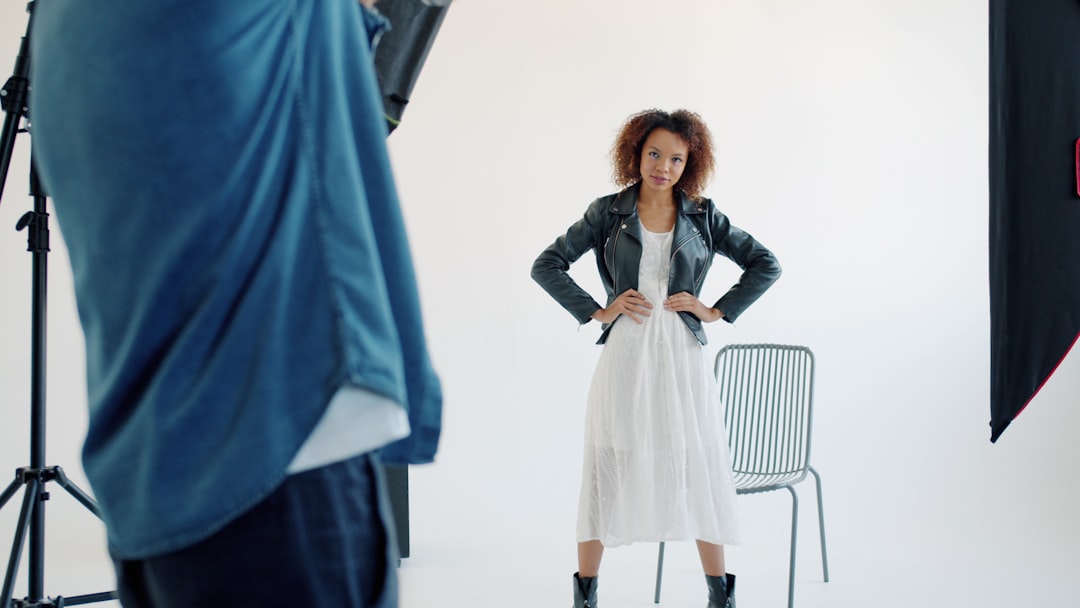
Backgrounds and Set Design on Zero Budget
Backgrounds communicate brand positioning before the viewer processes a single detail of the clothing. A cluttered background signals disorganization. An overly staged background can feel inauthentic. The goal is intentional simplicity — an environment that says “we thought about this” without screaming “we rented a set.”
Here are the most effective no-cost or low-cost background solutions for home filming:
- A clean wall in a neutral color. Paint one wall in your home a light warm white or greige if you’re serious about consistent content. This is a $40–$60 investment that pays for itself in the first month of content production.
- A well-styled corner. A small plant, a minimal shelf, and one decorative object can create a lifestyle context that positions clothing without overwhelming it. Keep the styling tight — no more than three elements visible in frame.
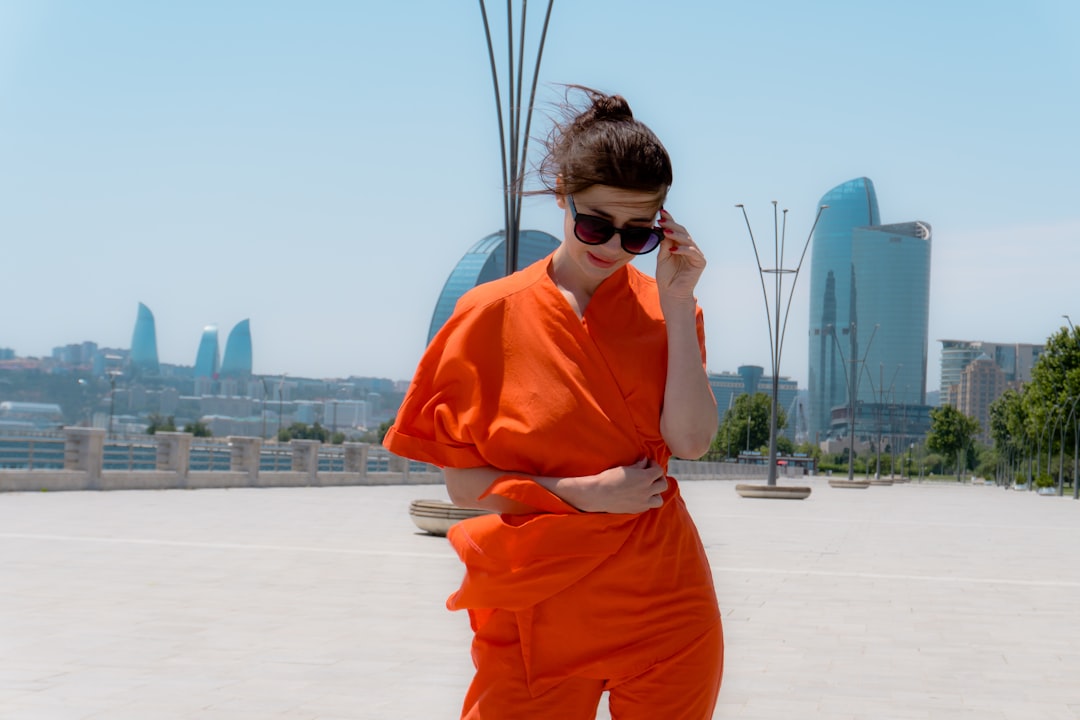
- Exterior locations: A brick wall, a doorway with interesting architecture, a well-lit alleyway, or a clean outdoor courtyard all function as free, high-production-value backgrounds. The key variable is consistent light control — overcast days are your friend outdoors.
- Seamless paper backdrop: A 53-inch wide roll of seamless paper in white, gray, or a brand-aligned color costs approximately $25–$40 and can be taped to a wall and draped onto the floor for full-length outfit shots. It rolls up for storage.
- Fabric hung from a curtain rod: Linen, velvet, or muslin fabric in neutral tones creates immediate depth and texture behind a subject. A 3-yard cut of fabric from a fabric store runs about $15–$30.
Consistency matters as much as quality. Once you’ve found a background that works, use it repeatedly. Audiences build brand recognition through repeated visual cues — your background becomes part of your content signature.
Getting the Shots: Movement, Angles, and What to Actually Film
The common mistake in DIY outfit video filming is treating it like a photo shoot — standing still and hoping the result looks dynamic. Video requires deliberate movement planning.
For each outfit, aim to capture at least four distinct shot types:
- Full-body static shot: Establishes the complete look. Subject faces camera, turns to show back and sides. This is the foundation clip.
- Walking shot: Subject walks toward or across the frame. This is the most effective way to show how fabric moves and how a silhouette reads in motion — two things still photography cannot communicate.
- Detail shots: Close-ups of fabric texture, embellishments, closures, print patterns, and styling choices. These are the shots that justify premium pricing because they show craftsmanship.
- Lifestyle or contextual shot: Subject doing something natural — adjusting sunglasses, picking up a bag, looking off-camera. These feel less produced and more relatable, which is particularly important for platforms like TikTok where authenticity signals trust.
On movement: slow, deliberate movement reads better on camera than rushed or self-conscious movement. If you’re self-filming, practice the movement once before recording. For walking shots, mark your start and stop positions with tape on the floor so you hit the same frame every time.
Once you have this raw footage library from a single outfit, the opportunities multiply considerably — the framework in How to Repurpose One Outfit Into 10 Video Formats shows exactly how far a single well-filmed look can stretch across platforms and content types.
Audio Considerations: The Element Most DIY Creators Ignore
Outfit video content is predominantly music-driven or voiceover-driven — but poor audio quality still undermines credibility in ways most creators don’t consciously recognize. Echoey rooms, background noise from appliances, and wind interference from air conditioning or fans all create a subliminal sense of “amateur” that affects how viewers perceive the brand, even in fully music-tracked videos.
If your content includes any direct-to-camera talking, voiceover explanation, or ASMR-style fabric sound capture (a growing trend in fashion content), audio quality becomes mission-critical.
Practical audio improvements for home filming:
- Film in a room with soft furnishings: Carpets, curtains, sofas, and clothing rails all absorb echo. Hard floors and bare walls create reverb that no plugin can fully remove.
- Use a wired lavalier microphone: A basic clip-on lav mic plugged directly into your phone’s headphone jack (or via a Lightning/USB-C adapter) costs $20–$40 and eliminates most room noise for voiceover or talking-head clips.
- Record audio separately if needed: For voiceover-driven content, record the audio in a small, soft-furnished room (a walk-in closet full of clothes is genuinely one of the best recording environments in a home) and sync it in editing.
- Eliminate background appliance noise: Turn off the HVAC, refrigerator hum, dishwasher, and any fans before recording a single word of voiceover.
Building an Efficient Batch Filming Workflow
The logistics of home filming are often more draining than the technical elements. Dragging out equipment, setting up the space, adjusting lighting, filming one outfit, and tearing everything down is exhausting and unsustainable as a regular practice. Batch filming — shooting multiple outfits in a single organized session — is the operational practice that separates content creators who sustain output from those who burn out.
A practical batch filming workflow for a home setup:
- Prep the space the night before. Set up your backdrop, position your tripod at the correct height, and do a test shot in your filming location. Resolve all the technical variables before the session day so you can focus entirely on the content.
- Organize outfits in shooting order. Group similar color palettes together to minimize lighting adjustments. Hang everything on a rack in the order you’ll film it.
- Set up a capture card or phone management system. Know where your files are going (cloud auto-upload, local storage, third-party drive) before you start. Running out of storage mid-session is a fixable but avoidable problem.
- Film all shot types for each outfit before changing. Static, walking, detail, lifestyle — complete the full sequence before moving to the next look. This prevents the confusion of trying to remember which clip belongs to which outfit during editing.
- Label clips immediately. Rename files or folders with the outfit name or SKU before the session ends. This saves hours in post-production organization.
A well-organized two-hour home filming session can produce footage for 8–12 outfits. That’s potentially four weeks of daily social content from a single afternoon — without a studio, without a crew, and without a production budget.
When to Skip Filming Altogether: AI Video as the Practical Alternative
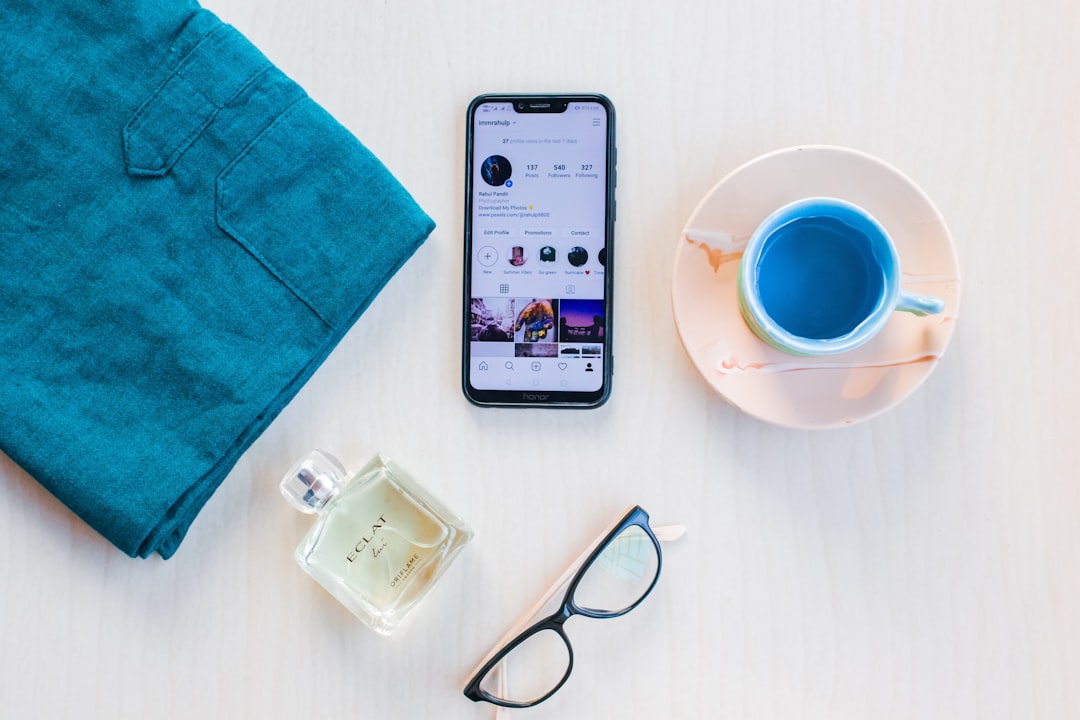
Here’s a reality that applies to a large segment of fashion sellers: you already have high-quality outfit photos. Product photography for e-commerce, lookbook shoots, influencer-generated content — most fashion brands are sitting on hundreds of static images that have never been turned into video.
This is exactly the problem Outfit Video was built to solve. Rather than filming new video content from scratch, Outfit Video transforms existing outfit photos into short-form social videos — complete with movement, transitions, and platform-optimized formatting — without requiring a camera, a location, or a filming session.
For brands managing large SKU catalogs, seasonal launches, or multiple channels simultaneously, the AI-assisted approach removes the production bottleneck entirely. One photo becomes a TikTok, a Pinterest Video Pin, an Instagram Reel, and a shoppable video asset — and if you want to understand how that shoppable layer works in practice, Shoppable Video for Fashion: From Content to Checkout covers the conversion mechanics in detail.
This isn’t an either/or decision. Many brands use filmed footage for hero content and AI-generated video for product catalog content, maintaining volume across both channels without proportionally scaling production costs.
Frequently Asked Questions
What is the best camera for filming outfit videos at home?
Your current smartphone — specifically the rear camera — is almost certainly sufficient for professional-quality outfit video content in 2026. Flagship phones from Apple, Samsung, and Google shoot 4K with strong dynamic range and built-in stabilization. What matters more than the camera model is lighting quality, stabilization (use a tripod), and correct settings. If you want to upgrade, a mirrorless camera like the Sony ZV-E10 II or similar entry-level options offer more manual control, but for most boutique and e-commerce use cases, a phone on a tripod with good window light outperforms a mediocre camera in bad lighting every time.
How do I get good outfit video lighting without buying expensive equipment?
Position yourself facing a large window during daylight hours. Tape or hang a sheer white curtain over the window to diffuse direct sunlight into soft, even illumination. Place a white foam board on the opposite side of the window (just outside the camera frame) to bounce light back and fill shadows. This three-element setup — window, diffuser, bounce card — costs under $30 and produces better results than most entry-level ring lights for full-body outfit shots.
What background should I use for outfit videos at home?
A clean, neutral-colored wall is the most versatile and brand-consistent background option for home filming. Light warm white, soft gray, and warm beige all work well for fashion content. If your walls aren’t ideal, a roll of seamless paper backdrop (available in photography supply stores for $25–$40) is the most cost-effective solution. Avoid backgrounds with strong patterns, busy décor, or color casts that could bleed onto light-colored garments in your footage.
How long should an outfit video be for social media in 2026?
Platform preferences vary, but the broadly effective range for fashion content is 7–15 seconds for Instagram Reels and TikTok, 6–10 seconds for Pinterest Video Pins, and up to 30–45 seconds for more editorial or styling tutorial content. Shorter clips with strong visual hooks in the first two seconds consistently outperform longer videos for product-focused outfit content. For platform-specific specs and crop-safe dimensions, refer to the Vertical Video Specs for Every Social Platform in 2026 guide.
Do I need to appear on camera to make effective outfit videos?
No. Some of the highest-performing fashion video formats — flat-lay videos, product detail close-ups, AI-animated outfit videos, and hands-only styling content — don’t require anyone on camera at all. If you do want to show clothing in motion on a body but don’t want to appear personally, hiring a local model for a few hours is typically far more affordable than renting a studio. Alternatively, AI-powered tools like Outfit Video can animate static photos into video content without any on-camera filming, which is an increasingly common approach for high-volume e-commerce catalogs and smaller brands without dedicated content teams.
Ready to Turn Your Outfit Photos Into Videos — Without Filming a Single Frame?
You don’t need a studio, a crew, or a production budget to create consistent, high-quality outfit video content. If you already have outfit photos, you already have everything you need to start.
Outfit Video transforms your existing fashion images into scroll-stopping short-form videos optimized for TikTok, Instagram Reels, Pinterest, and beyond — in minutes, not days.