Fashion Video Lighting: 5 Setups That Make Clothes Pop
June 2, 2026
fashion video lighting determines whether fabric texture reads clearly, colour appears true-to-life, and the overall frame looks polished enough to hold attention. The good news is that you do not need a professional studio to get it right. Five proven setups cover almost every scenario a fashion brand or creator will encounter, from bedroom shoots to flat lay content ready for AI animation.
- Natural window light remains the most accessible and flattering source for clothing video lighting, provided you diffuse direct sun correctly.
- A three-point lighting setup with key, fill, and back lights eliminates unflattering shadows and gives garments a commercial-grade finish.
- Ring lights are effective for face-forward try-on videos but require a reflector or second source to illuminate the full outfit.
- Flat lay lighting demands even, shadowless coverage — a two-light overhead rig or a lightbox achieves this consistently.
- Colour temperature consistency across your setup is critical; mismatched bulbs create colour casts that misrepresent fabric hues.
- AI video tools can compensate for moderate lighting imperfections, but starting with a well-lit source image always produces stronger results.
Why Lighting Defines Fashion Video Quality
A smartphone with a capable sensor can film excellent fashion content, but no sensor overcomes poor lighting. Outfit video lighting affects three things that directly influence purchasing decisions: colour accuracy, texture visibility, and perceived production quality.
Colour accuracy matters because a buyer deciding between a navy and a black garment needs to see the difference on screen. Texture visibility matters because the tactile quality of fabric — the ribbing on a knit, the sheen on satin, the pile on velvet — is one of the primary things video communicates that a static image cannot. Production quality matters because audiences have been conditioned by years of high-quality content to associate visual polish with brand trustworthiness.
Getting these three elements right consistently requires understanding which lighting setup matches which shooting scenario. The five setups below address the most common situations fashion creators and brands encounter.
Setup One: Natural Window Light
Natural window light is the starting point for most independent creators and small brands. Soft, directional, and free, it is also the most forgiving source for skin tones when filming on-body outfit content.
Position your subject or garment parallel to a large window rather than facing directly into it. Direct sun creates harsh shadows and blows out highlights; a north-facing window or a window with a sheer curtain provides consistent diffused light throughout the day. Shoot during mid-morning or mid-afternoon when the sun is at a moderate angle rather than directly overhead or low on the horizon.
The limitation of window light is its unpredictability. Cloud cover changes intensity, and shooting across multiple days or locations produces inconsistent results. For brands building a consistent visual identity across a seasonal fashion video strategy, supplementing window light with a single LED panel on the shadow side creates a reliable two-source setup that stays consistent regardless of weather.
Setup Two: Three-Point Lighting for On-Body Video
Three-point lighting is the industry standard for interview, lookbook, and try-on video because it eliminates flat, shadowless footage while also preventing the harsh shadows that a single source creates.
The three sources work as follows:
- Key light: Your primary and brightest source, positioned at roughly 45 degrees to one side of the subject and slightly above eye level. This is the light doing most of the work.
- Fill light: A softer source on the opposite side, approximately half the brightness of the key, used to reduce the intensity of shadows created by the key without eliminating them entirely.
- Back light (or rim light): Positioned behind and above the subject, this separates the garment from the background, adds dimension, and gives fabric a subtle definition that reads particularly well on knits and structured pieces.
For clothing video lighting, a softbox or umbrella modifier on the key light produces the most flattering results. Hard, unmodified lights emphasise texture in a way that can look unflattering on some fabrics. LED panel kits with adjustable colour temperature are widely available and allow you to match your artificial sources to any ambient light in the room.
Setup Three: Ring Light for Try-On and Close-Up Content
The ring light became a standard tool for fashion creators because of its accessibility and the characteristic catchlight it produces in eyes. For face-forward try-on content published to TikTok, Reels, or Shorts, a ring light placed at face height and roughly an arm’s length from the subject delivers consistent, even illumination.
The drawback is coverage. A ring light illuminates the face and upper body effectively but falls off quickly below the waist, leaving trousers, skirts, and footwear in comparative darkness. To address this, add a second light source — a floor-standing LED panel or a reflector bouncing the ring light back up from below — to ensure the full outfit reads in frame.
Ring lights also produce a flat, circular light pattern that lacks the dimensionality of a three-point setup. For editorial-quality lookbook content, three-point lighting is the stronger choice. For fast, consistent social content where speed of production matters, a ring light with a supplementary fill is a practical compromise.
Setup Four: Flat Lay Overhead Lighting
Flat lay fashion content — garments arranged on a surface and filmed or photographed from directly above — requires a fundamentally different lighting approach. The goal is even, shadow-free illumination across the entire surface. A single overhead light creates a hotspot in the centre and darker edges; shadows from creases and layered pieces become distracting rather than dimensional.
The most reliable flat lay setup uses two lights positioned at 45-degree angles on either side of the surface, both aimed at the centre. This cross-lighting approach balances shadows from both directions, producing even coverage. Softboxes or shoot-through umbrellas at equal distances and equal power settings are the most controllable option.
An alternative for smaller product shots is a lightbox — a collapsible box with diffused panels and internal LED strips that creates a self-contained, evenly lit environment. Lightboxes are particularly useful for accessory close-ups and detail shots.
Well-lit flat lay images are also the strongest source material for AI-generated video content. When a flat lay is evenly lit with clear fabric definition, tools that add motion to flat lay photos with AI produce significantly more accurate and compelling results than images with heavy shadows or blown highlights.
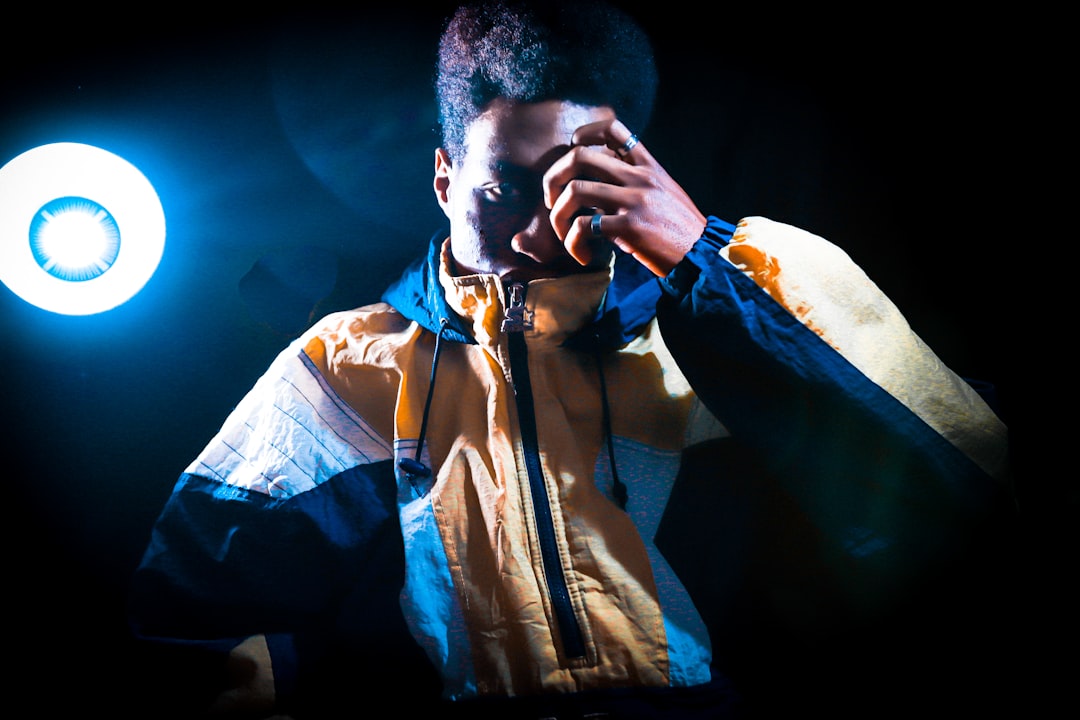
Setup Five: High-Key Lighting for Clean Background Looks
High-key lighting describes a setup in which the background and subject are illuminated at roughly equal brightness, producing a bright, airy, low-contrast image. It is the dominant aesthetic in e-commerce fashion video because it keeps attention on the garment and makes post-production background replacement straightforward.
To achieve a true high-key look, you need to light the background independently of the subject. A standard approach uses a three-point setup for the subject with two additional lights aimed at a white backdrop. The backdrop lights should be bright enough to render the background as pure or near-pure white without causing lens flare or spill onto the garment.
High-key video integrates cleanly with product page content. Fashion brands using video on product pages to lift conversion rate consistently find that clean, bright video with clear garment visibility outperforms moody, low-key alternatives in direct commerce contexts.
Colour Temperature and Consistency
Colour temperature is the element of clothing video lighting that creators most commonly overlook until it creates a problem in post-production. Measured in Kelvin, colour temperature describes the warmth or coolness of a light source. Daylight sits at around 5,500K to 6,500K. Tungsten bulbs produce warm light at around 2,700K to 3,200K. LED panels typically offer a range from 3,200K to 6,500K.
Mixing colour temperatures in a single setup — for example, using a cool daylight LED as a key light while tungsten room lighting contributes ambient fill — creates a colour cast that makes fabric colours appear inaccurate. A white shirt may read slightly orange or blue depending on which source dominates different areas of the frame.
Set every light source in your setup to the same Kelvin value, and set your camera’s white balance to match. This single step eliminates the majority of colour accuracy problems in fashion video and reduces colour correction time in editing. For brands producing volume content, consistent colour temperature also means consistent visual identity across all published assets.
FAQ
What is the best lighting setup for fashion video beginners?
Natural window light with a white reflector or foam board on the shadow side is the most accessible starting point. It requires no equipment investment, produces soft and flattering light, and works well for both on-body and flat lay content. As your production volume increases, a two-light LED panel kit gives you more control and consistency across sessions.
How do I avoid colour casts in clothing video lighting?
Set all light sources to the same colour temperature, expressed in Kelvin, and match your camera’s white balance setting to that value. Remove or block any ambient light sources — ceiling lights, lamps — that are set to a different colour temperature. Shooting in a colour-neutral space with white or grey walls also prevents reflective colour from bouncing onto your subject.
Does lighting affect how AI tools animate outfit photos?
Yes, significantly. AI tools that generate video from still images rely on clearly defined edges, consistent tone, and visible texture to produce accurate motion. Images with heavy shadows, blown highlights, or uneven illumination give the AI less accurate information to work with, which typically results in artefacts or imprecise fabric animation. Starting with a well-lit source image produces noticeably stronger AI-generated video output.
Can a ring light cover a full outfit in fashion video?
A standard ring light covers the face and upper body well but produces significant light falloff below the waist. To light a full outfit, supplement the ring light with a second source — an LED panel, a floor-standing light, or a large reflector — aimed at the lower half of the subject. Alternatively, increase the distance between the ring light and the subject slightly, which broadens its coverage at the cost of some intensity.
What colour temperature is best for fashion video lighting?
Daylight-balanced lighting at 5,500K to 6,000K is the most accurate choice for fashion video because it matches the colour temperature at which most camera sensors and monitor displays are calibrated. It renders whites cleanly, keeps colours true to life, and integrates well with natural daylight if you are shooting near windows. Warm sources at 3,200K can work for intentionally warm or editorial aesthetics but require careful white balance adjustment to avoid orange colour casts on fabric.
Ready to turn your outfit photos into scroll-stopping videos? Try Outfit Video free and create your first AI fashion video in minutes.
Want to create polished fashion videos without a studio or editing skills? Try Outfit Video free and turn your outfit photos into scroll-stopping clips in minutes.